AngularJS

angular-js

AngularJS is a Javascript framework maintained by Google which simplifies the development and testing of web applications for developers and testers.

Core features –

1. MVC Framework –

Model is data. It can be static data or dynamically fetched from a data source using JSON.
View – This is UI (User Interface) or whatever is visible in the browser.
Controller – Controls the business logic of the application.

2. Two-way Data Binding –

It simply means that –
1. When properties in the model get updated, so does the UI.
2. When UI elements get updated, the changes get propagated back to the model.

3. Templates –

It allows you to create templates which can be used in other HTML pages.

4. Single Page Applications –

It simply points to the fact that navigation between different screens of the website is achieved without loading a different web-page in the browser.

Example – GMAIL – When you click on a message in your INBOX, browser stays on the same web-page, but JavaScript code hides the INBOX and brings the MESSAGE BODY on screen.

Installing Oracle Database XE in Linux

To install Oracle Database XE:

1. Log on to your computer with root permissions.

2. Go to the following Web site:
http://www.oracle.com/technetwork/database/express-edition/downloads/index.html

3. Accept License Agreement and download the Linux version of Oracle Database XE.

4. Run the Oracle Database XE executable oracle-xe-11.2.0-1.0.x86_64.rpm to install Oracle Database XE using the command –
# rpm -ivh downloads/oracle-xe-11.2.0-1.0.x86_64.rpm

The installation displays a status of its progress.

5. When prompted, run the following command –
# /etc/init.d/oracle-xe configure

6. Enter the following configuration information –
A valid HTTP port for the Oracle Application Express (the default is 8080)
A valid port for the Oracle database listener (the default is 1521)
A password for the SYS and SYSTEM administrative user accounts
Confirm password for SYS and SYSTEM administrative user accounts
Whether you want the database to start automatically when the computer starts (next reboot)

This completes configuration.

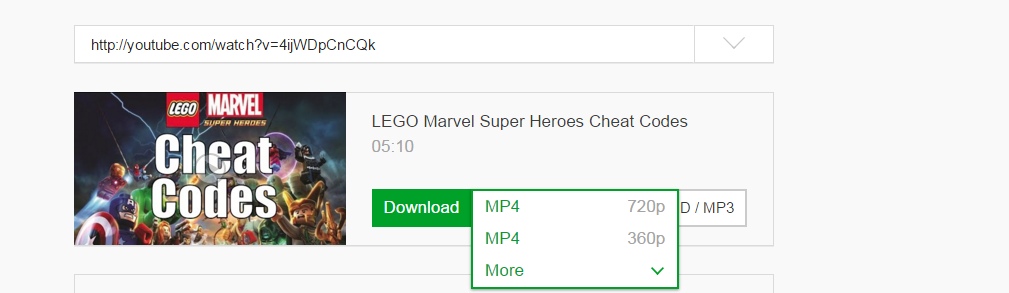
Downloading Youtube Videos

Go to the link of the video which you want to download.

1

Replace the URL by adding ‘ss’ before ‘youtube’ and press Enter.

2

You are directed to the website where you can download the video in the format you want.

You3

Using Database Link in Oracle

Suppose data from a table X in database D is to be copied into table Y in the same database, then the problem can be solved easily by executing the query –

Assumption

X(C(1),C(2),C(3)….C(N)) == Y(C(1),C(2),C(3)….C(N)) where C(1),C(2),etc. denote the columns of the table.

INSERT INTO Y SELECT * FROM X;
COMMIT;

Problem –

Data from a table X in database D1 has to be copied to table Y in database D2.

Assumption –

X(C(1),C(2),C(3)….C(N)) == Y(C(1),C(2),C(3)….C(N)) where C(1),C(2),etc. denote the columns of the table.

Workaround –

Oracle SQL Developer allows you to create INSERT query for each record in the table. The queries generated can be executed in database D2. But, suppose the table contains 2,00,000 records, it would take approximately 30 minutes to generate the INSERT script and almost an hour to execute the script.

Solution –

Login as SYSDBA(Database Administrator) using the query –

CONNECT SYS/ AS SYSDBA;

Allow the user to create database links using the query –

GRANT CREATE DATABASE LINK TO <userSchemaName(D2 in this case)>;

Connect to schema D2 and execute the query –

CREATE DATABASE LINK DATABASE_LINK_NAME CONNECT TO “SCHEMA_NAME(D1 IN THIS CASE)” IDENTIFIED BY “”
USING ‘(DESCRIPTION =(ADDRESS = (PROTOCOL = TCP)(HOST = HOST_NAME)(PORT = XXXX))(CONNECT_DATA = (SERVICE_NAME = ##SERVICE_NAME##)))’;

Execute the query –

INSERT INTO Y
SELCT * FROM X@DATABASE_LINK_NAME;
COMMIT;
Add Desktop Shortcut in Ubuntu

ubuntuhero

Here’s how to create a desktop shortcut in Ubuntu –

  1. Go to the location of the file you want to access from Desktop (using the file explorer).
  2. Right click => Make Link
  3. Right click newly created link file => Click Move to..
  4. Select Desktop as the location in the target selection dialog box.

Number system in Treta Yuga

numbers

These interesting slokas from Ramayana, gives an understanding of the number system used during Thretha yuga

शतम् शतसहस्राणाम् कोटिमाहुर्मनीषिणः ||
शतम् कोटिसहस्राणाम् शङ्कुरित्यभिधीयते |

100 = Shatham

1000 = Sahasram

100,000 = ShathaSahasram (or Sahasranam Shatham or Laksham)

10^7 = Koti

10^12 = Shanku

शतम् शङ्कुसहस्राणाम् महाशङ्कुरिति स्मृतः ||
महाशङ्क्य्सहस्राणाम् शतम् वृन्दमिहोच्यते |

10^17 = MahaShanku

10^22 = Vrundam

शतम् नृन्दसहस्राणाम् महावृन्दमिति स्मृतम् ||
महावृन्दसहस्राणाम् शतम् पद्ममिहोच्यते |

10^27 = MahaVrundam

10^32 = Padmam

शतम् पद्मसहस्राणाम् महापद्ममिति स्मृतम् ||
महापद्मसहस्राणाम् शतम् खर्वमिहोच्यते |

10^37 = MahaPadmam

10^42 = Kharvam

शतम् खर्वसहस्राणाम् महाखर्वमिति स्मृतम् ||
महाखर्वसहस्राणाम् समुद्रमभिधीयते |

10^47 = MahaKharvam

10^52 = Samudram

शतम् समुद्रसाहस्रमोघ इत्यभिधीयते ||
शतमोघसहस्राणाम् महौघ इति विश्रुतः |

10^57 = Ogha

10^62 = Mahaugha

Higher numbers were presented using combinations of above numbers. Great, isn’t it ?

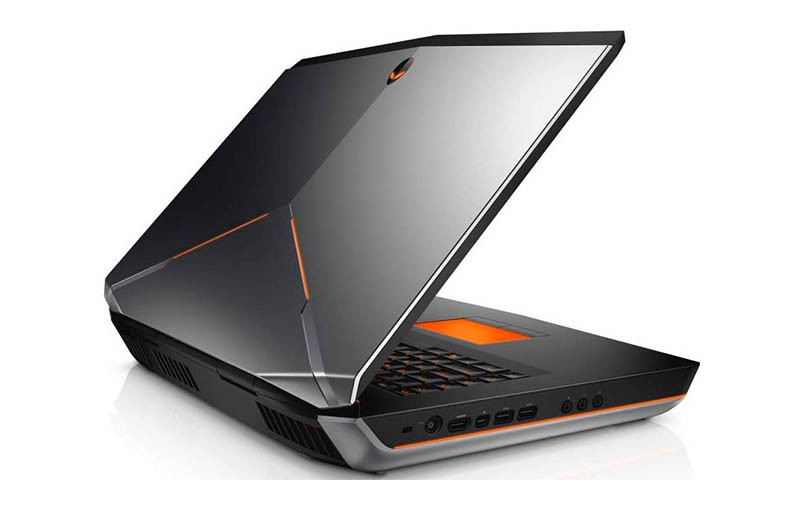
Installing Ubuntu on Alienware 17 R2

2_4_35

Heres how I could get my Alienware 17 working on Ubuntu –

  1. Connect the machine to Internet using a LAN cable.
  2. Change these after entering BIOS setup
    1. Set boot mode to Legacy
    2. Bring up the priority of the USB drive above hard disk in boot device list.
    3. Save and restart.
  3. Install Ubuntu from a USB stick.
  4. After booting to newly installed Ubuntu –
    1. Install Wifi
      1. Open Terminal
      2. sudo apt-get upgrade
      3. yeah that’s it. Atheros Qualcomm Killer Wifi driver would now be installed.
      4. Restart the system, look for Wifi icon in status bar to verify.
    2. Install NVidia GeForce Graphics card driver
      1. Open Terminal
      2. sudo add-apt-repository ppa:graphics-drivers/ppa
      3. sudo apt-get update
      4. sudo apt-get install nvidia-358 nvidia-settings  ( nvidia-358 was the latest version when I installed. Please find the current version from here )
      5. Restart, verify if “GeForce GTX ** ” is shown as the Graphics card in “About This Computer” dialog.
    3. Fix issue with headphones not working –
      1. Open Terminal
      2. alsamixer
      3. Press F6
      4. Select “HDA Intel PCH” card
      5. Press right arrow till the Item shown is “HP/Speaker Auto Detect”
      6. Press M to set it on.
      7. Connect headphones and verify if it works.

Your Linuxed Alienware should now be up with sound, graphics and Wifi and Bluetooth working without issues.

References :

https://bugs.launchpad.net/ubuntu/+source/linux/+bug/1383184

How to Install NVIDIA 358.16 Driver in Ubuntu 15.10, 14.04

https://launchpad.net/~graphics-drivers/+archive/ubuntu/ppa

http://askubuntu.com/questions/477933/audio-not-playing-through-headphones

Ravana – that decent guy. really ?

sita-abducted-by-ravana

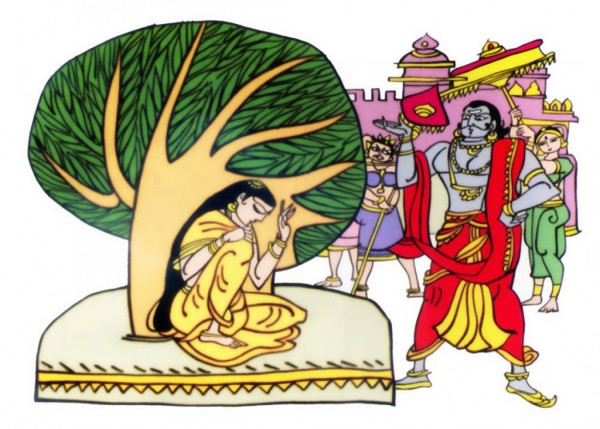
The real reason why Ravana did not use force on Sita devi. Taken from conversation between Ravana and his step brother Mahaparshva –

महापार्श्व निबोध त्वम् रहस्यम् किंचिदात्मनः |
चिरवृत्तम् तदाख्यास्ये यदवाप्तम् पुरा मया ||

“O, Mahaparsva! Know a little secret about me. I shall tell you an incident, which occurred to me long ago.”

पितामहस्य भवनम् गच्चन्तीम् पुञ्जिकस्थलाम् |
चञ्चूर्यमाणामद्राक्षमाकाशेऽग्निशिखामिव ||

“Once I saw a celestial nymph, Punjikasthala(by name) flashing like a flame, concealing herself in the sky and proceeding towards the abode of Brahma.”

सा प्रसह्य मया भुक्ता कृता विवसना ततः |
स्वयम्भूभवनम् प्राप्ता लोलिता नलिनी यथा ||

“She was unclothed by me and was enjoyed forcibly. Thereafter, appearing like a crumpled lotus, she went to the abode of Brahma.”

तच्च तस्य तदा मन्ये ज्ञातमासीन्महात्मनः |
अथ सम्कुपितो वेधा मामिदम् वाक्यमब्रवी ||

“I think that the matter was made known to the high souled Brahma and then the enraged Brahma spoke to me the following words:

अद्यप्रभृति यामन्याम् बलान्नारीम् गमिष्यसि |
तदा ते शतधा मुर्धा फलिष्यति न संशयः ||

“From today, if you revel with any woman forcibly, your head then undoubtedly will break asunder into a hundred pieces.”

( Refer : Valmiki Ramayanam, Yuddha Kandam 13:10 to 13:15)

Inducing intention into passive consciousness

Mantra-Weapon-557x350

धर्मात्मा सत्यसन्धश्च रामो दाशरथिर्यदि
पौरुषे च अप्रतिद्वन्द: शरैनं जहि रावणिं 

प्रत्यक्ष गद्यार्थ =  हे शर: यदि  दाशरथि: राम: धर्मात्मा सत्यसन्ध: च पौरुषे अप्रतिद्वन्द्व: चास्ति , तर्हि एनम् रावणिं जहि |

Context : At the end of 3 days (and nights) battle between Lakshmana and Indrajith, just when all divine weapons of Lakshmana seems to be  neutralized by equally potent counterparts by Indrajith, he invokes this covenant on an already powerful Aindraasthra (arrow with destructive powers of Indra/personification of electricity).

This is a wonderful sloka with multiple meanings, as viewed from perspective (or spiritual state) of the reader. Most relevant in age of Kali when all efforts to maintain order in mind and the world seems to fail, and men need help from supreme consciousness even to moderately follow Dharma.

SreeVidya Sanskrit transliterator, a powerful tool for the bilingual Indians

I’m writing this article to introduce an interesting new tool  – SreeVidya.

What is SreeVidya ?

SreeVidya is a software tool originally written to transliterate Sanskrit to different regional scripts of India. Besides this, the tool can also be used to read an Indian language in any other regional language.

This will mean a lot to you if you are a bilingual citizen of the country; as in if you knew both Bengali and Kannada, and is a native of Bengal, you can now read Kannada blogs, News articles, movie reviews etc in Bengali script. Similarly as a Tamil guy, if you also understand Malayalam, you can read Malayalam websites in Tamil.

sreeVidyaDemo1[Above: A snapshot of SreeVidya auto detecting the source scripts and printing in target script]

How ?

It so turns out that all Indian languages are based on the same sound structures used by Sanskrit. And SreeVidya takes advantage of exactly that. Under the hood it understands the sounds of written words, and uses this information to recreate words of target script.

SreeVidya’s original use was to cater the growing need of Sanskrit enthusiasts in the country to remove the overhead of learning Devanagari for starting to learn Sanskrit.

Install SreeVidya on Firefox –

To install SreeVidya on Firefox browser, the following steps will do –

  1. From Firefox browser, open https://addons.mozilla.org/
  2. In the search box in the top right corner, type SreeVidya.
  3. Click on the SreeVidya search result displayed in the drop down.
  4. When the SreeVidya addon page is loaded, click “Add to Firefox” button.
  5. In the subsequent popup, click “Install” button.
  6. Done ! You will now have SreeVidya icon on the top right corner of Firefox which is the handle to your Indian language transliteration.

Install SreeVidya on Chrome-

To install SreeVidya on Chrome browser, the following steps will do –

  1. From Chrome browser, open the page https://chrome.google.com/webstore/detail/sreevidya/bmpkeaablodlfaofkfjpechdjjbhopim
  2. Click the button “ADD TO CHROME” in this page.
  3. In the subsequent popup, click “Add extension”.
  4. Done ! You can now change the script of Samskritham (or other Indian language blogs) using the plugin icon that appears in the right top corner of the Chrome window.

Some of the portals you can now read in your own native script using SreeVidya –

You can find details here – http://sreevidya.codemarvels.com/