Introducing Android Debug Bridge – Part I

Any development work invariably involves the use of terminals. There are many who find the terminal much more fascinating than the GUI. This post is mainly targeted towards those. However, those who are not so much into command user interface, also need to take a look.

ADB exapanded as Android Debug Bridge is a versatile command line tool. It lets your system interact directly with an Emulator instance’s or a tethered Android device’s file system. Remember that this can be done on the device or the emulator itself using a terminal emulator, but writing and executing commands on the device becomes quite a task.
ADB comes with the Android SDK and no separate installation is required. It is located in <your android sdk> -> platform-tools -> adb.exe.

To get started with ADB we need to launch it first. Below instructions are for Windows Users.

  • Open up Run on Windows by pressing Windows+R.
  • Type in cmd to launch the Command Prompt.
  • Now navigate to your Android SDK directory using the cd command. For instance, my SDK is located in G:\Android Development\
    So I type in:

    G:
    cd Android Development
  • Furthermore, in order to navigate to platform-tools I type in:
    cd sdk/platform-tools
  • Type in the below command:
    adb
  • The above command gives a detailed summary of the components present in the ADB. It’s quite a read so you can spare some time to have a look.
  • Now type in the following command:
    adb shell
  • You are now inside the ADB shell. Here you can type and execute ADB commands. Start an emulator and after it has successfully started, execute the below command:
    adb devices
  • This shows the list of all running emulators and tethered Android devices. Remember that in some cases you might need to turn on USB Debugging in your Android device for it to be recognized by the ADB.
  • You can practically control your device from this terminal.

Now that you have a fair idea of what ADB is and what it is used for, it is time you try out some commands on your own. You can start off by reading the official Android Documentation for ADB here.

The post should act as a precursor to what we are going to do next, which is to use ADB shell for SQLite queries on our Application databases. In the part II of this post I will show you how we can stop relying on logs to see the data in our application’s database and make use of ADB shell instead, to do this in a simpler and effective manner.

Path Finding

Given an undirected,unweighted graph and two vertices u and v,the task is to find the path between these two vertices.u can be considered as the source vertex and v as the destination vertex.

Example-

Number of vertices-5
Number of edges-4
Given vertices are 2 and 4.
Edges-
1 2
1 3
3 4
4 5
The path between 2 and 4 is 2->1->3->4.

Algorithm-

1.DFS is called on vertex u.
2.A stack S is kept to keep track of the path between the source vertex and the current vertex.
3.As soon as destination vertex v is encountered,we return the path as the contents of the stack.

Code-

[cpp]

#include<stdio.h>
#include<vector>
#include<stack>
using namespace std;

vector<int>arr[10005];
int n,a,b,j=0,m;
int color[100005];
int u,v;
stack<int> path;

void dfs(int node)
{

//printing the vertices of the path
printf(“%d->”,node+1);

//until final vertex is reached
if(node!=v-1)
{

color[node]=2;//marking the visited nodes

for(int i=0;i<arr[node].size();++i)
{

if(color[arr[node][i]]==0)
{
dfs(arr[node][i]);
}
}
}
}

int main()
{
int t,p;
int i;
p=1;
j=0;

// n is the number of vertices
// m is the number of edges

scanf(“%d %d”,&n,&m);

// u is the source vertex
// v is the destination vertex

scanf(“%d %d”,&u,&v);

//clearing the arrays and vectors

for(i=0;i<n;i++)
arr[i].clear();

for(i=0;i<n;++i){
color[i]=0;
}

while(j<m)
{

//a and b denote the starting and ending points of the edge

scanf(“%d %d”,&a,&b);

//maintaining the adjacency lists

arr[a-1].push_back(b-1);
arr[b-1].push_back(a-1);
j++;

}

//calling dfs on source vertex

dfs(u-1);

return 0;
}

[/cpp]

Databases in Android using SQLite – Part III

Till now, we have restricted ourselves to very simple databases and hence we declare and define the database inside the Main Activity itself. However, this is mostly not the case. Often times in your application you would want to keep your Database and related functions separately from you activity. This is a much better idea because then your activity will consist of all related components and your database class will have all the methods related to creation, access or updation of the database.

In this post I will show you how to keep two classes, one for the Activity and another for your Database related operations. So create a project and follow along. Complete Source code is at the bottom.

  • Create a new Java Class, the super class of which is SQLiteOpenHelper. Name this DatabaseHelper.java
  • Once this is created, you can see that there are two methods that are already present, onCreate() and onUpgrade().
  • Create a class variable named DatabaseName of the type String and assign it a value “NeroDB or anything you like. This will be the name of your Database.
  • We will need to create a constructor for this Class, so write down the following lines just before onCreate() method
    [java]
    public DatabaseHelper(Context context) {
    super(context, DatabaseName, null, 1);
    }
    [/java]
  • Here we are calling the constructor of the Super Class and passing to it the Context, name of the database, CursorFactory(which is null here) and the version of our Database.
  • Now write the following lines in the onCreate(SQLiteDatabase db) method
    [java]
    db.execSQL(“CREATE TABLE IF NOT EXISTS NeroTable(LastName VARCHAR, FirstName VARCHAR, Age INT(3));”);
    [/java]
  • Again, write the following line in the onUpgrade(SQLiteDatabase db, int oldVersion, int newVersion) method
    [java]
    db.execSQL(“DROP TABLE NeroTable;”);
    db.execSQL(“CREATE TABLE IF NOT EXISTS NeroTable(LastName VARCHAR, FirstName VARCHAR, Age INT(3));”);
    [/java]
  • We have just told Android that when the database is created, create a table named NeroTable with the specified columns and if there is an upgrade in the version of the Database, drop the table and create it again leading to deletion of all data.
  • Now to insert values in the table, write the following method after the onUpgrade()

    [java]
    public void InsertValues()
    {
    SQLiteDatabase db = this.getWritableDatabase();
    db.execSQL(“INSERT INTO NeroTable VALUES(‘NeroLast1’, ‘NeroFirst1’, 20);”);
    db.execSQL(“INSERT INTO NeroTable VALUES(‘NeroLast2’, ‘NeroFirst2’, 21);”);
    db.execSQL(“INSERT INTO NeroTable VALUES(‘NeroLast3’, ‘NeroFirst3’, 22);”);
    db.close();
    }
    [/java]
  • Now that we are done with the DatabaseHelper class, switch over to the Main activity and create an object of the DatabaseHelper class. Remember to declare it outside all methods and inside the class.
    [java]
    DatabaseHelper db;
    [/java]
  • Define this inside the onCreate() method of the Main activity.
    [java]
    db = new DatabaseHelper(this);
    [/java]
  • By creating the object and defining it, the constructor of the DatabaseHelper class has been called and hence the Database and the table has been created.
  • Now to insert the values,
    [java]
    db.InsertValues();
    [/java]
  • Remember that we are only using the basic OOP Concepts here of calling a class’s constructor and using the object of that class to call it’s methods.
  • Save your work and execute it on the emulator.

Understanding the Code

  • The onCreate() and the onUpgrade() methods are quite clear.
  • The constructor of the Super method passes the Database Version too. If this Database version is to be changed, the onUpgrade() method comes into play and the table is deleted and recreated. You can try it out by changing the value to a different number.

COMPLETE SOURCE CODE

DatabaseHelper.java

[java]
package com.nero.myfirstapp;

import android.content.Context;
import android.database.Cursor;
import android.database.sqlite.SQLiteDatabase;
import android.database.sqlite.SQLiteOpenHelper;

public class DatabaseHelper extends SQLiteOpenHelper {

static String DatabaseName=”NeroDB”;

public DatabaseHelper(Context context) {
super(context, DatabaseName, null, 1);
}

@Override
public void onCreate(SQLiteDatabase db) {
db.execSQL(“CREATE TABLE IF NOT EXISTS NeroTable(LastName VARCHAR, FirstName VARCHAR, Age INT(3));”);
}

@Override
public void onUpgrade(SQLiteDatabase db, int oldVersion, int newVersion) {
db.execSQL(“DROP TABLE NeroTable;”);
db.execSQL(“CREATE TABLE IF NOT EXISTS NeroTable(LastName VARCHAR, FirstName VARCHAR, Age INT(3));”);
}

public void InsertValues()
{
SQLiteDatabase db = this.getWritableDatabase();
db.execSQL(“INSERT INTO NeroTable VALUES(‘NeroLast1’, ‘NeroFirst1’, 20);”);
db.execSQL(“INSERT INTO NeroTable VALUES(‘NeroLast2’, ‘NeroFirst2’, 21);”);
db.execSQL(“INSERT INTO NeroTable VALUES(‘NeroLast3’, ‘NeroFirst3’, 22);”);
db.close();
}
}

[/java]

Main.java

[java]
package com.nero.myfirstapp;

import android.media.MediaPlayer;
import android.os.Bundle;
import android.preference.PreferenceManager;
import android.app.Activity;
import android.app.AlertDialog;
import android.app.Dialog;
import android.app.ProgressDialog;
import android.content.DialogInterface;
import android.content.Intent;
import android.content.SharedPreferences;
import android.database.Cursor;
import android.database.sqlite.SQLiteDatabase;
import android.util.Log;
import android.view.LayoutInflater;
import android.view.Menu;
import android.view.MenuItem;
import android.view.View;
import android.view.View.OnClickListener;
import android.widget.Button;
import android.widget.EditText;
import android.widget.Toast;

public class Main extends Activity {
DatabaseHelper db;
@Override
protected void onCreate(Bundle savedInstanceState) {
super.onCreate(savedInstanceState);
setContentView(R.layout.activity_main);
db = new DatabaseHelper(this);
db.InsertValues();
db.close();
}
}

[/java]

Longest path in a tree

Given an unweighted and undirected tree,the task is to find the length of the longest path (from one node to another) in that tree.The length of a path in this case is number of edges we traverse from source to destination.

Example-

Number of nodes=3
Number of edges=2
Edges-
1 2
2 3

Output-
2
(1->2->3 is the longest path in the given tree which has a length of 2 units).

Algorithm-

1.Loop through the vertices, starting a new depth first search whenever the loop reaches a vertex that has not already been included in previous DFS calls.
2.A dist[] array is constructed to record the distances of all the vertices from the starting vertex ie. vertex on which DFS is called.
3.Maximum of all the values of the dist[] array is found and the respective vertex number is found.Let it be v.
4.Now,DFS is called on v and dist[] array records the distances of all the vertices from the vertex v.
5.Maximum of all the values of the dist[] array is the final answer that is it is the length of the longest path in the tree.

Code-

[cpp]

#include<stdio.h>
#include<vector>
#include<algorithm>
#include<iostream>
using namespace std;

vector<int>arr[10005];

int n,a,b,j=0,m;

int color[10005],dist[10005];

//d denotes the distance of the node on which DFS is called from the starting vertex.
void dfs(int node,int d)
{
color[node]=2;
//marking the visited vertices

dist[node]=d;

for(int i=0;i<arr[node].size();++i)
{

if(color[arr[node][i]]==0)
{
dfs(arr[node][i],d+1);
}
}
}

int main()
{
int p;

int i1;
p=1;j=0;

//n is the number of vertices
scanf(“%d”,&n);

for(i=0;i<n;i++)
arr[i].clear();
for(i=0;i<n;++i)
{
color[i]=0;dist[i]=0;
}

//tree has n-1 edges

while(j<n-1)
{
scanf(“%d %d”,&a,&b);
//a and b denote the starting and ending vertices of an edge

arr[a-1].push_back(b-1);
arr[b-1].push_back(a-1);
j++;
}
for(i=0;i<n;++i)
{
if(color[i]==0)
dfs(i,0);
}

int max=0;

// p denotes the vertex with maximum distance

for(i=0;i<n;i++)
{
if(dist[i]>=max)

{ max=dist[i];
p=i;
}
}
//resetting the arrays to call DFS again

for(i=0;i<n;++i)
{
color[i]=0;dist[i]=0;
}

//calling dfs on vertex which has max distance

dfs(p,0);
max=0;
for(i=0;i<n;i++)
{
if(dist[i]>=max)

{ max=dist[i];
p=i;
}
}

cout<<max<<endl;

return 0;

}

[/cpp]

Applications of DFS

One of the applications of DFS is to find the number of connected components in a graph.In graph theory, a connected component of an undirected graph is a sub-graph in which any two vertices are connected to each other by paths, and which is connected to no additional vertices in the super-graph.

Algorithm-

A depth first search that begins at some particular vertex v will find the entire connected component containing v (and no more) before returning.To find all the connected components of a graph, loop through its vertices, starting a new depth first search whenever the loop reaches a vertex that has not already been included in a previously found connected component.

Another application is to find if the given graph is a tree or not.A tree is an undirected graph which is connected and does not have cycles.

Properties of a tree-

1.The tree should have only one connected component ie. it is not a disconnected graph.
2.If the graph has N vertices and N-1 edges,then it is a tree.This condition ensures that no cycles are formed.

Algorithm-

For a graph to be a tree,both the above conditions must be satisfied.Number of components is found using the above algorithm and it should be 1.Then,the second relation must be verified.

Code-

[cpp]

#include<stdio.h>
#include<vector>
using namespace std;

vector<int>arr[10005];
int n,a,b,j=0,m;
int color[100005];

//counter counts the number of components

int counter;

void dfs(int node)
{
color[node]=2;//marking the visited nodes

for(int i=0;i<arr[node].size();++i)
{

if(color[arr[node][i]]==0)
{
dfs(arr[node][i]);
}
}
}

int main()
{
int t,p;
int i;
counter=0;
p=1;
j=0;

// n is the number of vertices
// m is the number of edges

scanf(“%d %d”,&n,&m);

//clearing the arrays and vectors

for(i=0;i<n;i++)
arr[i].clear();

for(i=0;i<n;++i){
color[i]=0;
}

while(j<m){

//a and b denote the starting and ending points of the edge

scanf(“%d %d”,&a,&b);

//maintaining the adjacency lists

arr[a-1].push_back(b-1);
arr[b-1].push_back(a-1);
j++;

}
//looping through the vertices

for(i=0;i<n;++i)
{
if(color[i]==0)
{
dfs(i);
counter++;
}
}

printf(“Number of components is %d\n”,counter);

if((m==n-1)&&(counter==1))printf(“IT IS A TREE\n”);

else printf(“NOT A TREE\n”);

return 0;
}
[/cpp]

Databases in Android using SQLite – Part II

In the last post I showed you how to create a database. We created a table inside it and inserted values. Although we could make sure that our database was successfully created, we had no way to confirm the same about our tables. In this post I’ll show you how to access the data from a database.

So create an activity and follow along. Complete Source Code is at the bottom

  • Set the Content View of the activity. Do not put any elements in the layout.
  • Switch over to the java file and write the below lines after the setContentView() method.
    [java]
    SQLiteDatabase db = openOrCreateDatabase(“NeroDB”, MODE_PRIVATE, null);
    db.execSQL(“CREATE TABLE IF NOT EXISTS NeroTable(LastName VARCHAR, FirstName VARCHAR, Age INT(3));”);
    db.execSQL(“INSERT INTO NeroTable VALUES(‘NeroLast1’, ‘NeroFirst1’, 20);”);
    db.execSQL(“INSERT INTO NeroTable VALUES(‘NeroLast2’, ‘NeroFirst2’, 21);”);
    db.execSQL(“INSERT INTO NeroTable VALUES(‘NeroLast3’, ‘NeroFirst3’, 22);”);
    [/java]
  • Since, this post assumes that you have a fair idea of SQLite, you can change the name of the Database, table and the values inside the table to whatever you wish.
  • Now, we will access the data from our database. Notice that we have not yet closed the database, this being the reason.
  • Write the code below. I strongly recommend not to paste these lines, but to write them using the Auto-Complete feature of Eclipse editor. That way, in the suggestion, you can see the method signatures and it will help you understand what we are doing and also change a few values to your liking.
    [java]
    Cursor c = db.rawQuery(“SELECT * FROM NeroTable;”, null);
    while(c.moveToNext()){
    Log.v(“NeroLog”, c.getString(c.getColumnIndex(“FirstName”)));
    }
    [/java]
  • Now, we will drop the Table and delete the database. We are doing this because if we do not, every time we run the application, the three rows will be inserted into the table. You can choose to let it be and not drop the table and the database. In case you do want to, write the below lines.
    [java]
    db.execSQL(“DROP TABLE NeroTable;”);
    this.deleteDatabase(“NeroDB.db”);
    [/java]
  • Remember to close the database irrespective of whether or not you did the above step.
    [java]
    db.close();
    [/java]
  • Now execute the application in an emulator.
  • Once it runs successfully, switch over to the DDMS section. If you wrote the exact lines as I have you will find Logs with the tag NeroLog and the values as the first name column values in the database. This is how you make sure that your table has been created and the values have been inserted.

Db2

Understanding the Code

  • Cursor :- Cursor is analogous to a pointer in most programming languages, It points to the beginning of the set of rows returned from a query.
  • rawQuery(String SQL, String [] SelectionArgs) :- This method returns a Cursor and is similar to execSQL(). It provides a way to provide selection arguments to an SQL query. I will talk about selection arguments in a later post.
  • moveToNext() :- Since a cursor points to the beginning of rows, this function provides a way to sequentially access each row.
  • Log.v :- Verbose Log. Creates a Log with the provided tag and message in the DDMS LogCat.
  • getColumnIndex :- This is a way to access the column by name of the row currently pointed to by Cursor.
  • deleteDatabase() :- This method is used to delete the database.

COMPLETE SOURCE CODE

[java]
package com.nero.myfirstapp;

import android.media.MediaPlayer;
import android.os.Bundle;
import android.preference.PreferenceManager;
import android.app.Activity;
import android.app.AlertDialog;
import android.app.Dialog;
import android.app.ProgressDialog;
import android.content.DialogInterface;
import android.content.Intent;
import android.content.SharedPreferences;
import android.database.Cursor;
import android.database.sqlite.SQLiteDatabase;
import android.util.Log;
import android.view.LayoutInflater;
import android.view.Menu;
import android.view.MenuItem;
import android.view.View;
import android.view.View.OnClickListener;
import android.widget.Button;
import android.widget.EditText;
import android.widget.Toast;

public class Main extends Activity {

@Override
protected void onCreate(Bundle savedInstanceState) {
super.onCreate(savedInstanceState);
setContentView(R.layout.activity_main);

SQLiteDatabase db = openOrCreateDatabase(“NeroDB”, MODE_PRIVATE, null);
db.execSQL(“CREATE TABLE IF NOT EXISTS NeroTable(LastName VARCHAR, FirstName VARCHAR, Age INT(3));”);
db.execSQL(“INSERT INTO NeroTable VALUES(‘NeroLast1’, ‘NeroFirst1’, 20);”);
db.execSQL(“INSERT INTO NeroTable VALUES(‘NeroLast2’, ‘NeroFirst2’, 21);”);
db.execSQL(“INSERT INTO NeroTable VALUES(‘NeroLast3’, ‘NeroFirst3’, 22);”);
Cursor c = db.rawQuery(“SELECT * FROM NeroTable;”, null);
while(c.moveToNext()){
Log.v(“NeroLog”, c.getString(c.getColumnIndex(“FirstName”)));
}
db.execSQL(“DROP TABLE NeroTable;”);
this.deleteDatabase(“NeroDB.db”);
db.close();
}
}
[/java]

Databases in Android using SQLite – Part I

In this post I will show you how to integrate SQLite and Java in your Android Application. If you do not have a fair idea of SQLite, I would suggest you to take a look at my previous post and follow the instructions.

Create an Activity and start programming. Complete Source Code is at the bottom.

  • Set the Content View of the activity. Do not put any elements in the layout.
  • Switch over to the java file and write the below lines after the setContentView() method.
    [java]
    SQLiteDatabase db = openOrCreateDatabase(“NeroDB”, MODE_PRIVATE, null);
    db.execSQL(“CREATE TABLE IF NOT EXISTS NeroTable(LastName VARCHAR, FirstName VARCHAR, Age INT(3));”);
    db.execSQL(“INSERT INTO NeroTable VALUES(‘NeroLast1’, ‘NeroFirst1’, 20);”);
    db.execSQL(“INSERT INTO NeroTable VALUES(‘NeroLast2’, ‘NeroFirst2’, 21);”);
    db.execSQL(“INSERT INTO NeroTable VALUES(‘NeroLast3’, ‘NeroFirst3’, 22);”);
    db.close();
    [/java]
  • Since, this post assumes that you have a fair idea of SQLite, you can change the name of the Database, table and the values inside the table to whatever you wish.
  • Save your activity and execute it on the emulator.
  • It is apparent that you have no way of knowing whether the database and the table were successfully created and whether the values were inserted into it.
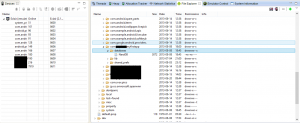
  • This is where DDMS comes into play. Switch over to the DDMS section and you should see the File Explorer section just above the LogCat and Console. This is an explorer for the files in the SD card of the emulator. Remember that the emulator must be running in order for you to browse the files.
  • Navigate to data/data/<yourapplicationname>/databases. Here you should see a database file with the name of the database. If it is there, your database was successfully created. If not, something went wrong and you should check your code.

Db1

  • Remember that your application may encounter exceptions that require you to Force Close you application. In such cases refer to the LogCat in the DDMS and it should point you exactly to what exception was encountered. Also, you should know that since the exception may be encountered in on of the SQL queries, your Database and the table might have been successfully created and the exception occured thereafter.

Understanding the Code

  • SQLite Database db :- This is an instance of SQLite Database that we are creating.
  • openOrCreateDatabase(String Name, int mode, CursorFactory Factory) :- This functions opens the database if there exists a database by the name provided. If not, it creates one and opens it. Mode is provided in order to let the system know the accessibility of the database. By MODE_PRIVATE, we tell the system that this database is private to our application. CursorFactory is beyond the scope of this post. We do not need to use it and hence it is provided a value of null.
  • execSQL() :- This function allows us to write the SQL query as a string and execute it. Remember that there are other ways to write queries in which pure SQL will not be used.
  • close() :- This function closes the database. Recall that we had used the openOrCreateDatabase to open the database. Closing the database is essential to prevent leak.

COMPLETE SOURCE CODE

Main.java

[java]
package com.nero.myfirstapp;

import android.media.MediaPlayer;
import android.os.Bundle;
import android.preference.PreferenceManager;
import android.app.Activity;
import android.app.AlertDialog;
import android.app.Dialog;
import android.app.ProgressDialog;
import android.content.DialogInterface;
import android.content.Intent;
import android.content.SharedPreferences;
import android.database.Cursor;
import android.database.sqlite.SQLiteDatabase;
import android.util.Log;
import android.view.LayoutInflater;
import android.view.Menu;
import android.view.MenuItem;
import android.view.View;
import android.view.View.OnClickListener;
import android.widget.Button;
import android.widget.EditText;
import android.widget.Toast;

public class Main extends Activity {

@Override
protected void onCreate(Bundle savedInstanceState) {
super.onCreate(savedInstanceState);
setContentView(R.layout.activity_main);

SQLiteDatabase db = openOrCreateDatabase(“NeroDB”, MODE_PRIVATE, null);
db.execSQL(“CREATE TABLE IF NOT EXISTS NeroTable(LastName VARCHAR, FirstName VARCHAR, Age INT(3));”);
db.execSQL(“INSERT INTO NeroTable VALUES(‘NeroLast1’, ‘NeroFirst1’, 20);”);
db.execSQL(“INSERT INTO NeroTable VALUES(‘NeroLast2’, ‘NeroFirst2’, 21);”);
db.execSQL(“INSERT INTO NeroTable VALUES(‘NeroLast3’, ‘NeroFirst3’, 22);”);
db.close();
}
}

[/java]

Android development: Introducing SQLite

As you start to develop complex applications containing multiple activities and providing multiple functionality, often times you would want to store structured data in your application. Android provides a mechanism to do this using Databases.
The SQL that is used with Android system is SQLite. Just like MySQL is used with PHP and Microsoft SQL Server with ASP.NET, SQLite is used with Android System.

  • SQLite is an open source database that supports standard relational database features like SQL syntax and transactions.
  • SQLite supports a variety of data types like Text, Integer, Real etc. Text is similar to Strings in most Programming Languages.
  • SQLite is embedded in every Android device eliminating the need for any setup procedure.
  • All one needs to do in order to work with SQLite databse is to write SQL queries to create and update the database.
  • All the Databases contained within your application will be saved in the directory DATA/data/<yourappname>/databases/filename.

This tutorial series is concerned with Android Application Development and although databases are a major sections  I will not be concentrating on SQLite but on integrating SQLite with Android. Nevertheless, there are some very good tutorials on the internet that can come in handy while learning SQLite. Below are a few :-

For the scope of this tutorial series, a fair knowledge of SQLite should be enough. Further posts will assume the following :-

  • You have a fair idea of SQLite and it’s working.
  • You can write well formed SQL queries.
  • You have a fair idea of the how the values are returned for the queries.

In the next post I’ll show you how to integrate SQLite and Java for the purpose of Android Development.
Happy learning SQLite.

Longest Common Subsequence

Given two sequences,the task is to find the length of longest sub-sequence present in both of them. A sub-sequence is a sequence that appears in the same relative order, but not necessarily contiguous.For example- “abc”,”fit”,”abfi”,etc are sub-sequences of “abcfit”.A string of length n has 2^n different possible sub-sequences.

Example-

String 1- “BATTING” Length-7
String 2- “BOWLING” Length-7

Longest Common Sub-sequence- “BING” Length-4

Brute Force-

Generate all sub-sequences of both given sequences and find the longest matching sub-sequence.It has an exponential time complexity.

Efficient Algorithm-
lcs(i,j)=
              if (X[i]==Y[j])
             1+lcs(i-1,j-1)
              else
              max(lcs(i-1,j),lcs(i,j-1))

where X[],Y[] are strings.

Recursive Solution-

[cpp]

//char X[0,1…m-1],Y[0,1,…n-1] contains the strings
//lcs(m,n) is called initially.

int lcs(int a,int b)
{
if (a == 0 || b == 0)
return 0;

if (X[a-1] == Y[b-1])
return 1 + lcs(a-1,b-1);
else
return max(lcs(a,b-1), lcs(a-1,b));
}

[/cpp]

This problem has overlapping as well as optimal substructure property.Thus,dynamic programming can be applied.A temporary array L[ ][ ] is constructed to store the intermediate results.

DP solution-

[cpp]

int lcs(int m,int n)
{
int L[m+1][n+1];
int i,j;

// L[i][j] contains length of LCS of X[0..i-1] and Y[0..j-1]

for (i=0; i<=m; i++)
{
for (j=0; j<=n; j++)
{
if (i == 0 || j == 0)
L[i][j] = 0;

else if (X[i-1] == Y[j-1])
L[i][j] = L[i-1][j-1] + 1;

else
L[i][j] = max(L[i-1][j], L[i][j-1]);
}
}

//L[m][n] contains length of LCS for X[0..n-1] and Y[0..m-1]

return L[m][n];
}

[/cpp]
This program has a time complexity of O(m*n) where m,n are lengths of the string which is much better than exponential time complexity.

Activity Selection Problem

Activity selection problem is an example of greedy algorithm.Greedy algorithms look for simple, easy-to-implement solutions to complex, multi-step problems by deciding which next step will provide the most obvious benefit.The advantage of using a greedy algorithm is that solutions to smaller sub-problems of the problem can be straightforward and easy to understand.The disadvantage is that it is entirely possible that the most optimal short-term solutions may lead to the worst long-term outcome.

Problem-

Given n activities with their start and finish times,we have to find the maximum number of activities that can be performed by a single person,assuming that a person can only work on a single activity at a time.

Algorithm-

1) Sort the activities according to their finishing time
2) Select the first activity from the sorted array and print it.
3) Do following for remaining activities in the sorted array.
a) If the start time of this activity is greater than the finish time of previously selected activity then select this activity and print it.

Example-

start[]={1,5,7,1}

finish[]={7,8,8,8}

The maximum set of activities that can be executed by a single person is {0,2} where 0,2 are the activity numbers.

start[] = {1, 3, 0, 5, 8, 5}

finish[] = {2, 4, 6, 7, 9, 9}

The maximum set of activities that can be executed by a single person is {0, 1, 3, 4}.

Code-

[cpp]
#include <cstdio>
#include <algorithm>
using namespace std;

pair< int, int > a[100000];

//a[].first denotes the finish time
//a[].second denotes the starting time

int main()
{
int i, n, last;

//n denotes the number of activities

scanf(“%d”, &n);

for(i = 0; i < n; i++)
{
scanf(“%d %d”,&a[i].second,&a[i].first);
}
//using sort function for an array of pairs sorts
// it according to the first one.
//sorting according to finish time
sort(a, a + n);

last = -1;//initialization
for(i = 0; i < n; i++)
{
if(a[i].second>= last) //step 3
{
//printing the activity number which is selected
printf(“%d “,i);
last = a[i].first;
}
}

return 0;
}

[/cpp]