Publishing your Android Application

All done and dusted, when you are ready to upload your application to the Android Market for the world to use it, you’ll have to follow a few steps below.

  • Remember to change the AndroidManifest.xml file to the specifics such as min SDK version etc.
  • In your manifest file, switch to the manifest tab. In the Exporting section is an option Use the Export Wizard to export and sign an apk.
  • Select the Project that you want to export and click Next.
  • Now for the Keystore selection, this provides a certificate to you application. Since you do not have a keystore yet, click on Create New Keystore. Remember to save this certificate in a safe location and not lose it. If you decide to update your application in the future, you’re going to need the same certificate. If you somehow happen to lose this certificate, you’re going to have to upload a whole new application again.
  • Select the location and provide and confirm a password.
  • In the Key Creation section provide an Alias so as to refer to the key being created.
  • Provide a password. For validity in years put in 25.
  • Fill in your First and Last Name. You can also go ahead and provide the other details if you want.
  • In the next step, browse and select a location for you final apk file.
  • When you look for an application on the Android Market, you must have seen a lot of pictures and graphics on the application page. You can choose to create those graphics for your application too. I’m going to skip this step.
  • Now got to http://market.android.com/publish.
  • Click on Upload Application towards the bottom. Follow the on-screen instructions and upload the apk and other necessary graphics.

You’re done!! Your application is up and running on the Market!!

6 Websites Android Developers Must Know

Creating an Android Application that users can both use and appreciate is not an easy task. However, obviously some online resources can make your life easier. I present below 6 websites that are a “must know” for all Android Developers.

  • The Android Developer Official Page
    androiddeveloperObviously, this website contains answers to all questions that an Android Developer can possibly have. The Official Documentation is just too good and sufficiently comprehensive for newbies. Visit Android Developer Website.
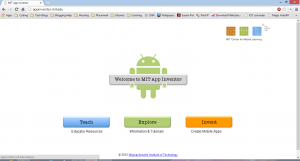
  • MIT App Inventor
    mitappinventor
    Probably, the best website after the Official Android Developer website for learning and teaching Android Development. I suggest all of you do take a look at it. Visit MIT App Inventor.
  • Color Combos
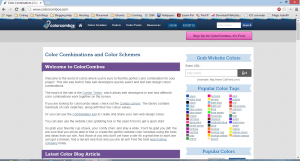
    colorcombos
    Obviously in your application you will need to choose colors. Color Combos helps you do this in a jiffy. Visit Color Combos.
  • Icon Finder
    iconfinder
    Fancy icons add a new dimensions to the looks of an application. But of course a simple Google search might not return icons of proper pixel size as you might want. But Icon Finder will. Visit Icon Finder.
  • What The Font
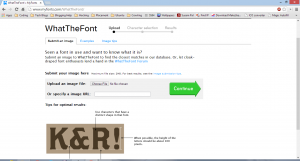
    whatthefont
    You are surfing the web and you come across a font that you can’t take your eyes off. Surely you want to know which font that is. What the Font makes it as easy as it gets. Visit What The Font.
  • Convert Icon
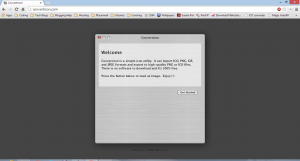
    converticon
    Well of course, it can resize your icons to your selected pixel size. Visit Convert Icon.

I do hope these help you create better, faster,smarter and visually appealing applications!!

The “Values” Folder

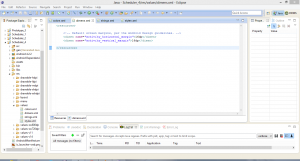
While developing Android Applications, one inevitably comes across the Values folder. It is located in <workspace>-><application name>->res. It holds some very important and interesting resources which I am going to tell you about in this post.

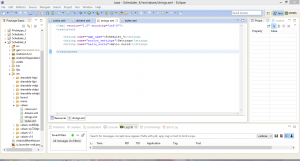
  • The strings.xml file is already present when you create a new Application Project in Eclipse. It holds the important strings with their ids.  The manifest file contains the android:label attribute of the application set to @string/app_name. app_name is the id which holds your application name. Similarly it also contains the android:style attribute set to @string/AppTheme. The strings.xml file provides a way to use the same string values in multiple places throughout the application.
    strings
  • In the newer versions of Eclipse the dimens.xml file is also present on the creation of a new application project. It holds the dimensions again mapped with ids. The MainActivity.java file on creation already contains commands that use the dimensions in dimens.xml file.
    dimens
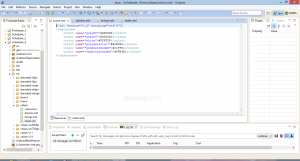
  • One can also create xml files in the values folder. The snippet below shows a colors.xml I creates to use in one of my applications. Like the ones described above it contains the hex code of colors mapped with ids.
    value1
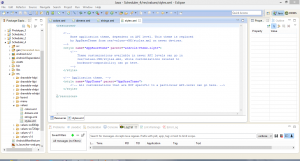
  • The below snippet shows styles.xml file. Depending on the version of the SDK and Eclipse, it might or might not be created on the creation of a new Application project. It contains various styles for layouts.
    styles
  • Remember, that above are just the xml files from one of my applications. You can create any number of xml files to suit your needs. All the values and resources inside them will be accessible from each module of your application.

As you are now familiar with most of the Android Development techniques, you will often require to change and modify the values folder. Keep experimenting!!

Swipe Detector in Android

If you’ve used an Android device, Swipe Detection is not new to you. Unlocking the phone, receiving calls etc. all make use of a Swipe Detector mechanism. Technically speaking, a Swipe is known as a Motion Event in Android.

In this post I will show you how to create a Swipe Detection mechanism and use it for various purposes. Start up an activity and follow along. Here I will give you the Source Code first and then go on to explain it later.

[java]
package com.nero.myfirstapp;

import android.view.MotionEvent;
import android.view.View;

public class SwipeDetector implements View.OnTouchListener{
public static enum Action {
LR, // Left to right
RL, // Right to left
TB, // Top to bottom
BT, // Bottom to top
None // Action not found
}

private static final int HORIZONTAL_MIN_DISTANCE = 80; // The minimum distance for horizontal swipe
private static final int VERTICAL_MIN_DISTANCE = 30; // The minimum distance for vertical swipe
private float downX, downY, upX, upY; // Coordinates
private Action mSwipeDetected = Action.None; // Last action

public boolean swipeDetected() {
return mSwipeDetected != Action.None;
}

public Action getAction() {
return mSwipeDetected;
}

/**
* Swipe detection
*/@Override
public boolean onTouch(View v, MotionEvent event) {
switch (event.getAction()) {
case MotionEvent.ACTION_DOWN:
{
downX = event.getX();
downY = event.getY();
mSwipeDetected = Action.None;
return false; // allow other events like Click to be processed
}
case MotionEvent.ACTION_MOVE:
{
upX = event.getX();
upY = event.getY();

float deltaX = downX – upX;
float deltaY = downY – upY;

// horizontal swipe detection
if (Math.abs(deltaX) > HORIZONTAL_MIN_DISTANCE) {
// left or right
if (deltaX < 0) {

mSwipeDetected = Action.LR;
return true;
}
if (deltaX > 0) {

mSwipeDetected = Action.RL;
return true;
}
} else

// vertical swipe detection
if (Math.abs(deltaY) > VERTICAL_MIN_DISTANCE) {
// top or down
if (deltaY < 0) {

mSwipeDetected = Action.TB;
return false;
}
if (deltaY > 0) {

mSwipeDetected = Action.BT;
return false;
}
}
return true;
}
}
return false;
}

}
[/java]

Understanding the Code

  • We have created an Enum names Action which contains all possible motion events possible.
  • The method getAction() return a boolean value which determines if a motion event has been detected.
  • ACTION_DOWN : It tells the device that a pressure gesture is in motion. Read about it here. It is a short and comprehensive description
  • ACTION_MOVE : It tells the device that a pressure gesture is in motion and that a change has occurred since the beginning of the gesture. Read about it here. It is a short and comprehensive description.
  • HORIZONTAL_MIN_DISTANCE is the minimum swipe length that is required to consider the gesture a horizontal swipe. We do not want to process every click or misplaced touches to be considered a swipe.
  • VERTICAL_MIN_DISTANCE is the minimum swipe length that is required to consider the gesture a vertical swipe. We do not want to process every click or misplaced touches to be considered a swipe.
  • Now, all we need to do is simple math, to determine if the swipe is from Left to Right, Right to Left, Top to Bottom and Bottom to Top.
  • Remember that the return values depend on what type of actions you want to be detecting. In the above code I want only horizontal swipes ans hence I am returning false when a vertical swipe is detected, irrespective of whether it is Top to Bottom or Bottom to Top.

Using Swipe Detector

The Swipe Detector can be used in any module you like. Below is a code snippet that can be used with modifications as necessary.

[java]
if(swipeDetector.swipeDetected()){
if(swipeDetector.getAction() == SwipeDetector.Action.LR){
Toast.makeText(getApplicationContext(), “Left to Right”, Toast.LENGTH_SHORT).show();
}
if(swipeDetector.getAction() == SwipeDetector.Action.RL){
Toast.makeText(getApplicationContext(), “Right to Left”, Toast.LENGTH_SHORT).show();
}
[/java]
Android development primer: Working with Sliding Drawers in Android – Part II

In the first part, I showed you how to use a basic Sliding Drawer in Android. In this post I’ll show you how to make your Sliding Drawers fancier by changing the handle image when the Sliding Drawers is open and when it is closed. The complete source code is at the bottom.

  • Save the two images from here and here. Name them help_handle_open and help_handle_close respectively.
  • Navigate to <yourprojectname> -> res -> drawable-ldpi/mdpi/hdpi/xhdpi/xxhdpi.
  • Right click and select New -> Android XML file. Choose selector from the Root Element list. Name the xml file help_handle_customizer.
  • Paste the following code in it.
    <selector
    	xmlns:android="http://schemas.android.com/apk/res/android">
    	<item
    		android:state_pressed="true"
    		android:drawable="@drawable/help_handle_open" />
    	<item
    		android:state_focused="true"
    		android:drawable="@drawable/help_handle_close" />
    	<item
    		android:drawable="@drawable/help_handle_open" />
    </selector>
  • In the ImageView which you have for your SlidingDrawer Handle change the @android:src attribute value to @drawable/help_handle_customizer.

Now, when you run it on the emulator or an actual device, you can see the handle images changing based on whether the Sliding Drawer is open or close.

COMPLETE SOURCE CODE

activity_main.xml

<?xml version="1.0" encoding="utf-8"?>
<FrameLayout
    xmlns:android="http://schemas.android.com/apk/res/android"
    android:layout_width="fill_parent"
    android:layout_height="fill_parent"
    android:layout_gravity="bottom"
    android:background="#D0D0D0"
    android:paddingBottom="0dp">

    <SlidingDrawer
        android:id="@+id/slidingDrawer"
        android:handle="@+id/drawerHandle"
        android:content="@+id/contentLayout"
        android:layout_width="wrap_content"
        android:layout_height="200dip"
        android:orientation="horizontal"
        android:layout_gravity="center_vertical">

        <RelativeLayout
            android:layout_width="wrap_content"
            android:layout_height="wrap_content"
            android:id="@+id/handlerl"
            android:paddingBottom="0dp">

	        <ImageView
	            android:id="@+id/drawerHandle"
	            android:src="@drawable/help_handle_customizer"
	            android:layout_width="wrap_content"
	            android:layout_height="wrap_content"
	            android:layout_alignParentRight="true" >
        	</ImageView>

        </RelativeLayout>

        <ScrollView
            android:id="@+id/contentLayout"
            android:layout_width="match_parent"
            android:layout_height="match_parent" >

        <RelativeLayout
            android:id="@+id/inner"
            android:gravity="center"
            android:layout_width="match_parent"
            android:layout_height="wrap_content"
            android:background="#B0B0B0">

            <TextView
		        android:id="@+id/helptv1"
		        android:layout_height="wrap_content"
		        android:layout_width="wrap_content"
		        android:text="Your first text goes here."
		        android:paddingTop="5dp"
		        android:paddingBottom="5dp"
		        android:paddingLeft="5dp"
		        android:paddingRight="5dp"
		        android:textColor="#000000">
		    </TextView>

            <TextView
		        android:id="@+id/helptv2"
		        android:layout_height="wrap_content"
		        android:layout_width="wrap_content"
		        android:layout_below="@+id/helptv1"
		        android:text="Your second text goes here."
		        android:paddingTop="5dp"
		        android:paddingBottom="5dp"
		        android:paddingLeft="5dp"
		        android:paddingRight="5dp"
		        android:textColor="#000000">
		    </TextView>

            <TextView
		        android:id="@+id/helptv3"
		        android:layout_height="wrap_content"
		        android:layout_width="wrap_content"
		        android:layout_below="@+id/helptv2"
		        android:text="Your third text goes here."
		        android:paddingTop="5dp"
		        android:paddingBottom="5dp"
		        android:paddingLeft="5dp"
		        android:paddingRight="5dp"
		        android:textColor="#000000">
		    </TextView>

            <TextView
		        android:id="@+id/helptv4"
		        android:layout_height="wrap_content"
		        android:layout_width="wrap_content"
		        android:layout_below="@+id/helptv3"
		        android:text="Your fourth text goes here."
		        android:paddingTop="5dp"
		        android:paddingBottom="5dp"
		        android:paddingLeft="5dp"
		        android:paddingRight="5dp"
		        android:textColor="#000000">
		    </TextView>

        </RelativeLayout>
        </ScrollView>

    </SlidingDrawer>
</FrameLayout>

A Simple Server

The task is to construct a simple server which just passes a string to the client.

Client/server describes the relationship between two computer programs in which one program, the client, makes a service request from another program, the server, which fulfills the request. Although the client/server idea can be used by programs within a single computer, it is a more important idea in a network.
A server runs on a specific computer and has a socket that is bound to a specific port number. The server just waits, listening to the socket for a client to make a connection request.
InputStream and OutputStream are used to transfer of data between server and client.

java.net includes Socket and ServerSocket classes.
java.io includes DataOutputStream and DataInputStream classes.

    Server-

[java]
import java.io.*;
import java.net.*;

public class server {

public static void main(String[] args) {
try{
ServerSocket s=new ServerSocket(1254); //same port number
Socket s1=s.accept(); //accepts the connection
OutputStream stout=s1.getOutputStream();
DataOutputStream dos=new DataOutputStream(stout);
dos.writeUTF(“HELLO WORLD”);
dos.close();
s1.close();
}
catch(Exception e)
{System.out.println(“”+e);}

}

}
[/java]

    Client-

[java]
import java.io.*;
import java.net.*;

public class client {
public static void main(String[] args) {
try{
Socket s= new Socket(“localhost”,1254);//localhost or any other IP
InputStream sin=s.getInputStream();
DataInputStream din=new DataInputStream(sin);
String str=new String(din.readUTF());
System.out.println(“”+str);
din.close();
sin.close();
s.close();
}
catch(Exception e)
{System.out.println(“”+e);}
}
}

[/java]


Note-

To check the programs,simultaneously run both the programs.

Subset Sum Problem (Part II)

Given a set of numbers,our task is to find the number of subsets that sum to a particular value.

Example-

Set of numbers- {1,3,2,5,4,9}
Sum=9

Subsets that sum to 9-

{1,3,5}
{5,4}
{9}
{3,2,4}

Thus,number of subsets that sum to 9 = 4.

Algorithm-

The idea is to find the number of possible sums with the current number.And its true that,there is exactly one way to bring sum to 0. At the beginning,we have only one number. We start from our target and subtract that number.If it is possible to get a sum of that number,then add it to the array element corresponding to the current number.

Code-

[cpp]

//N is the number of elements,
//sum is the given value,
//numbers[] contains the elements

int GetmNumberOfSubsets()
{
int dp[1000];
dp[0] = 1;
int currentSum =0;

for (int i = 0; i < N; i++)
{
currentSum += numbers[i];
for (int j = std::min(sum, currentSum); j >= numbers[i]; j–)
dp[j] += dp[j – numbers[i]];
}

return dp[sum];
}

[/cpp]

Note-

This algorithm works only for positive numbers.

Subset Sum Problem

Given a set of positive integers and a value sum,the task is to find if there is a subset with sum equal to the given value.

Example-

Given set of numbers- {3,34,4,12,5,2}

Sum=9.

The output will be ‘True’ because 4+5=9.

Algorithm-

The problem can be divided into two sub-problems-

1.By including the last element.
2.By excluding the last element.

Recursive Solution-

[cpp]
subsum(set, n, sum) = subsum(set, n-1, sum) //excluding the last element
|| subsum(arr, n-1, sum-set[n-1]) //including the last element

Base Cases:

subsum(set, n, sum) = false, if sum > 0 and n == 0
subsum(set, n, sum) = true, if sum == 0
[/cpp]

Code-

The above algorithm has exponential time complexity which can be converted to code having polynomial complexity using dynamic programming that is storing the intermediate results.

[cpp]

// Returns true if there is a subset of set[] with sum equal to given sum

bool isSubsetSum(int set[], int n, int sum)
{
// The value of subset[i][j] will be true if there is a subset of set[0..j-1]
// with sum equal to i
bool subset[sum+1][n+1];

// If sum is 0, then answer is true

for (int i = 0; i <= n; i++)
subset[0][i] = true;

// If sum is not 0 and set is empty, then answer is false

for (int i = 1; i <= sum; i++)
subset[i][0] = false;

// Fill the subset table in bottom up manner

for (int i = 1; i <= sum; i++)
{
for (int j = 1; j <= n; j++)
{
subset[i][j] = subset[i][j-1];
if (i >= set[j-1])
subset[i][j] = subset[i][j] || subset[i – set[j-1]][j-1];
}
}

return subset[sum][n];
}

[/cpp]

Android development primer: Working with Sliding Drawers in Android – Part I

You have to agree that the Sliding Drawer feature of Android is a pretty neat and handy tool to add some text – usually directions for use, help or other important details. Here’s what a Sliding Drawer looks like. The bold black lines are where some text will appear.

sd_close         open

Remember that a Sliding Drawer option is provided in the Palette in the Graphical Layout tab of any xml under the Composite section. However, I like to use a custom Sliding Drawer. It gives me absolute control over what my Sliding Drawer handle looks like, what orientation is it drawn into, what view I want it to have ( a custom one if needed) etc.

So below I provide a sample source code of how to code a Sliding Drawer into you layout. However, I would strongly recommend trying out the Sliding Drawer element from the Palette first, making a few changes to see how it reflects in the layout and then coming back here to look at the source code. This will help you get familiar with the xml.

<?xml version="1.0" encoding="utf-8"?>
<FrameLayout
    xmlns:android="http://schemas.android.com/apk/res/android"
    android:layout_width="fill_parent"
    android:layout_height="fill_parent"
    android:layout_gravity="bottom"
    android:background="#D0D0D0"
    android:paddingBottom="0dp">

    <SlidingDrawer
        android:id="@+id/slidingDrawer"
        android:handle="@+id/drawerHandle"
        android:content="@+id/contentLayout"
        android:layout_width="wrap_content"
        android:layout_height="200dip"
        android:orientation="horizontal"
        android:layout_gravity="center_vertical">

        <RelativeLayout
            android:layout_width="wrap_content"
            android:layout_height="wrap_content"
            android:id="@+id/handlerl"
            android:paddingBottom="0dp">

	        <ImageView
	            android:id="@+id/drawerHandle"
	            android:src="@drawable/help_handle_customizer"
	            android:layout_width="wrap_content"
	            android:layout_height="wrap_content"
	            android:layout_alignParentRight="true" >
        	</ImageView>

        </RelativeLayout>

        <ScrollView
            android:id="@+id/contentLayout"
            android:layout_width="match_parent"
            android:layout_height="match_parent" >

        <RelativeLayout
            android:id="@+id/inner"
            android:gravity="center"
            android:layout_width="match_parent"
            android:layout_height="wrap_content"
            android:background="#B0B0B0">

            <TextView
		        android:id="@+id/helptv1"
		        android:layout_height="wrap_content"
		        android:layout_width="wrap_content"
		        android:text="Your first text goes here."
		        android:paddingTop="5dp"
		        android:paddingBottom="5dp"
		        android:paddingLeft="5dp"
		        android:paddingRight="5dp"
		        android:textColor="#000000">
		    </TextView>

            <TextView
		        android:id="@+id/helptv2"
		        android:layout_height="wrap_content"
		        android:layout_width="wrap_content"
		        android:layout_below="@+id/helptv1"
		        android:text="Your second text goes here."
		        android:paddingTop="5dp"
		        android:paddingBottom="5dp"
		        android:paddingLeft="5dp"
		        android:paddingRight="5dp"
		        android:textColor="#000000">
		    </TextView>

            <TextView
		        android:id="@+id/helptv3"
		        android:layout_height="wrap_content"
		        android:layout_width="wrap_content"
		        android:layout_below="@+id/helptv2"
		        android:text="Your third text goes here."
		        android:paddingTop="5dp"
		        android:paddingBottom="5dp"
		        android:paddingLeft="5dp"
		        android:paddingRight="5dp"
		        android:textColor="#000000">
		    </TextView>

            <TextView
		        android:id="@+id/helptv4"
		        android:layout_height="wrap_content"
		        android:layout_width="wrap_content"
		        android:layout_below="@+id/helptv3"
		        android:text="Your fourth text goes here."
		        android:paddingTop="5dp"
		        android:paddingBottom="5dp"
		        android:paddingLeft="5dp"
		        android:paddingRight="5dp"
		        android:textColor="#000000">
		    </TextView>

        </RelativeLayout>
        </ScrollView>

    </SlidingDrawer>
</FrameLayout>

There are a few things worth noting here :-

  • I have used a frame layout rather than Linear/Relative Layout. I particularly am much more comfortable with it while working with Sliding Drawers. You can read about Frame Layouts here.
  • The Sliding Drawer has attributes namely – android:handle and android:content. Notice that an ImageView is present that has the same id as the value for android:handle and a ScrollView with the same id as the value of android:content.
  • The android:handle attribute defines the handle of your sliding drawer.
  • The android:content attribute defines what your Sliding Drawer holds.
  • Notice that the ImageView which is the handle of the Sliding Drawer has an src attribute of @drawable/help_handle. Recollect from my earlier posts, to use an icon you must paste it in the drawable-ldpi/mdpi/hdpi/xhdpi/xxhdpi folder. I have an image by the name help_handle.png in my drawable folder.
  • Remember that this sort of reference is done in the xml. If you choose to refer to it from your Java code you must use R.drawable.<youriconname>.
  • Notice that the Sliding Drawer has a different handle (Image that works as a handle) when it is closed than from what it has when it is open. If you use the code I provided you with, you will not see this happening. I will discuss how to do it in detail in a later post. For now you can use the image here. Paste it in <eclipseworkspace>/<yourprojectname>/res/drawable-ldpi/mdpi/hdpi/xhdpi/xxhdpi.

Code it. Execute it on the emulator. Once it runs properly, start experimenting!! 🙂

Time Picker in Android

Just like Number Picker provides a neat way to select values from a given range, Android also provides a Time Picker tool. This, as the name suggest is used to pick time. Now, you can use the Time Picker the way you use Number Picker, but this post shows how to use it with the help of a TimePickerDialog.

  • Create a layout for an activity and insert a button. This button will trigger a dialog which will contain the TimePicker.
  • Define the button in the Java file.
  • Set the onClick() method for the button.[java]
    b.setOnClickListener(new OnClickListener() {

    @Override
    public void onClick(View v) {
    showDialog(9999);
    }
    });
    [/java]

  • Create a new method onCreateDialog(). This comes into play when we call a Dialog to appear quite like the one we did above.
    [java]
    protected Dialog onCreateDialog(int id){
    switch(id){
    case 9999:
    return new TimePickerDialog(this, timePickerListener, Calendar.HOUR_OF_DAY, Calendar.MINUTE, false);
    }
    return null;
    }
    [/java]
  • We are setting the current time of the device as the default time every time the dialog appears.
  • Now, we need to define what happens when a time is selected. Here, I am just creating a Toast to show the selected time. Remember that you can do whatever you want. We will override the method onTimeSetListener()
    [java]
    private TimePickerDialog.OnTimeSetListener timePickerListener = new TimePickerDialog.OnTimeSetListener() {

    @Override
    public void onTimeSet(TimePicker view, int newhour, int newminute) {
    Toast.makeText(getApplicationContext(), newhour+”:”+newminute, Toast.LENGTH_LONG).show();
    }
    };
    [/java]

  • Save and run the application on an emulator or device.

Tpick1  Tpick2

Remember that the Time is always set in 24 Hour format.

COMPLETE SOURCE CODE

MainActivity.java

[java]
package com.nero.mysecondapp;

import java.util.Calendar;

import android.os.Bundle;
import android.app.Activity;
import android.app.Dialog;
import android.app.TimePickerDialog;
import android.view.Menu;
import android.view.View;
import android.view.View.OnClickListener;
import android.widget.Button;
import android.widget.NumberPicker;
import android.widget.TimePicker;
import android.widget.Toast;

public class MainActivity extends Activity {

@Override
protected void onCreate(Bundle savedInstanceState) {
super.onCreate(savedInstanceState);
setContentView(R.layout.activity_main);
Button b = (Button) findViewById(R.id.button1);
b.setOnClickListener(new OnClickListener() {

@Override
public void onClick(View v) {
showDialog(9999);
}
});
}

protected Dialog onCreateDialog(int id){
switch(id){
case 9999:
return new TimePickerDialog(this, timePickerListener, Calendar.HOUR_OF_DAY, Calendar.MINUTE, false);
}
return null;
}

private TimePickerDialog.OnTimeSetListener timePickerListener = new TimePickerDialog.OnTimeSetListener() {

@Override
public void onTimeSet(TimePicker view, int newhour, int newminute) {
Toast.makeText(getApplicationContext(), newhour+”:”+newminute, Toast.LENGTH_LONG).show();
}
};

@Override
public boolean onCreateOptionsMenu(Menu menu) {
// Inflate the menu; this adds items to the action bar if it is present.
getMenuInflater().inflate(R.menu.main, menu);
return true;
}

}

[/java]