Open package.json of the existing ReactJS App. Copy the sections – scripts, dependencies, browserList from the above package.json and paste it into the ReactBasedPhoneApp/package.json
Build the existing ReactJS App
npm run build
After the build completes successfully, copy the contents inside the build folder of the existing reactJS app to ReactBasedPhoneApp/www folder
Problem: The Cordova App when run on Android give a Connection refused error on https://localhost/* URLs.
Fix: Follow these steps:
Edit package.json
Set homepage from “./” to “https://10.0.2.2/”
Save, build and run the App.
Probable Reason: Localhost seems to get routed to the host while the emulator runs the App within a virtual container (assumption). 10.0.2.2 is a special IP mapped to the “localhost” of the emulated environment.
I had recently lost my domain codemarvels.com; the warning emails from my domain provider was reaching a currently unused inbox, and thus had to spawn up the same website on codemarvels.in (the one that you are currently on).
The only command that worked for me on my EasyEngine deployment (for my ssl enabled website) was:
#upgrade to ee4 with this command
wget -qO ee https://rt.cx/ee4 && sudo bash ee

#clone existing website to new one.
ee site clone codemarvels.com codemarvels.in --ssl=le
If your new domain is mapped to this server, it should be ready for serving.
Glad to write about a twitter bot I had written and launched during the last Independence day – Tat Kim. For those who are not in the know, Tat Kim means “What’s that?” in Sanskrit – a very apt name for a Bot and allied service which answers questions of Sanskrit enthusiasts.
What does the Tat Kim Bot do?
Currently Tat Kim bot can be used to read Sanskrit tweets in your own script (Eg, Malayalam or Kannada) – there by taking away the need to know how to read Hindi (or Devanagari) to be able to consume these tweets.
Why?
Sanskrit is a pan-Indian language and it should be free from the constraints of a regional Lipi like Devanagari. Also, it helps to remember that some of the seminal works in Sanskrit were recorded not in Devanagari, but in Grantha Lipi (more or less Malayalam of our times)
Usage
If you happen to find a Sanskrit tweet from your favourite Sanskrit tweeple, comment on that tweet in the below format
@TatKimBot {languageCode}

Where language could be one from:
en, hi, bn, gu, kn, ml, or, pa, te, ta, mr
Details of Language codes:
Code
script
en
English
hi
Devanagari (Kept to support translations to Hindi at a later point of time)
bn
Bengali
gu
Gujarati
kn
Kannada
ml
Malayalam
or
Oriya
pa
Punjabi
te
Telugu
ta
Tamizh (The transliterations will be lossful due to Tamil script not being elaborate enough to represent all sounds of Sanskrit)
mr
Marathi (Kept to support translations to Marathi at a later point of time)
Example:
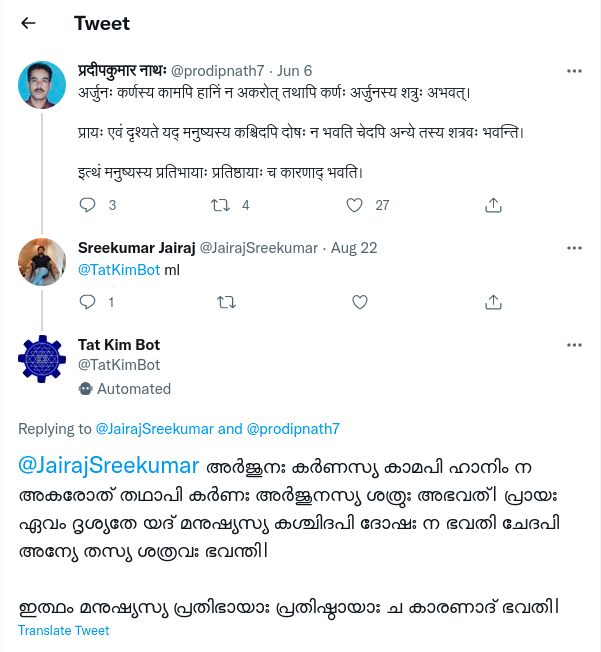
@TatKimBot ml And the bot responds in 15 seconds as in the below screenshot:
Archives of the transliterations
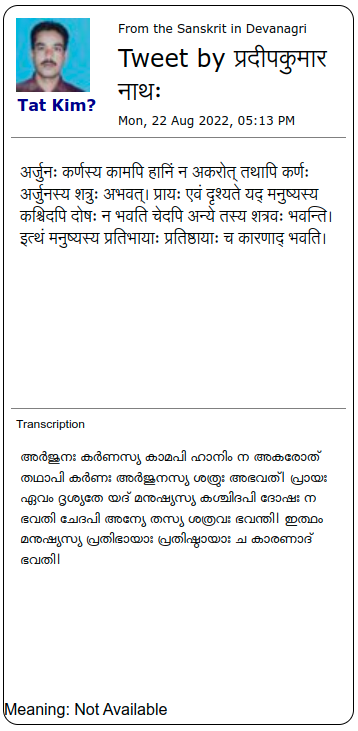
The archives of the transliterations done by Tat Kim Bot will be available at the web portal https://tat.kim
(A sample screenshot below)
Look forward to people finding and using it during the next few months!
#ssh into source server and do these

mkdir ~/cassandra-bkup
sudo cp /etc/medusa/medusa-example.ini /etc/medusa/medusa.ini
sudo vi /etc/medusa/medusa.ini

# Search for, and set these values in the ini file
storage_provider = local
base_path = /home/{username}/cassandra-bkup
# Save and Exit

medusa backup --backup-name=dev-db-data --mode=full

#compress output folder
tar -czf dev-db-bkup-tar ~/cassandra-bkup

# SCP the backup directory to destination server
scp -r -i <key-file> dev-deb-bkup-tar {dest-user}@{dest-server}:~/
Import data in Target DB
# ssh into target serer and do these
tar -xzf dev-deb-bkup-tar

ls ls /home/{username}/cassandra-bkup/cassandra_backups/
#note down the folder name parallel to the folder index, let it be {sourceHostLocalName}
sudo /etc/hosts
#add an entry with local nodes IP and host name as {sourceHostLocalName}.
#You can remove this later
# save /etc/hosts and Exit Vim.
sudo medusa restore-node --keyspace={keyspace of intereset} --backup-name=dev-db-data
Verify Imported data
cqlsh {targetNodeIp}
desc keyspaces #verify you have the source keyspace created
use {keyspaceOfInterest}
desc tables; #verify all your tables in the source are recreated here.
That’s it. You should now be able to work with your new Cassandra node!